Unable to connect to IP Camera
Incorrect Subnet Configuration
Unable to connect to IP Camera
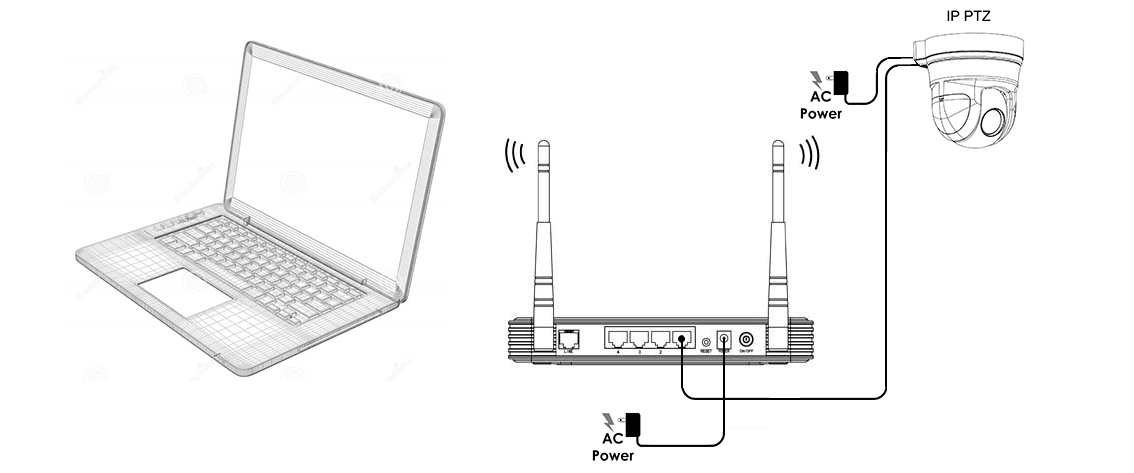
Ok, so you have just purchased an IP camera and you are ready to set it up. You plug it in correctly to your Router with an Ethernet connection, as in the diagram bellow.
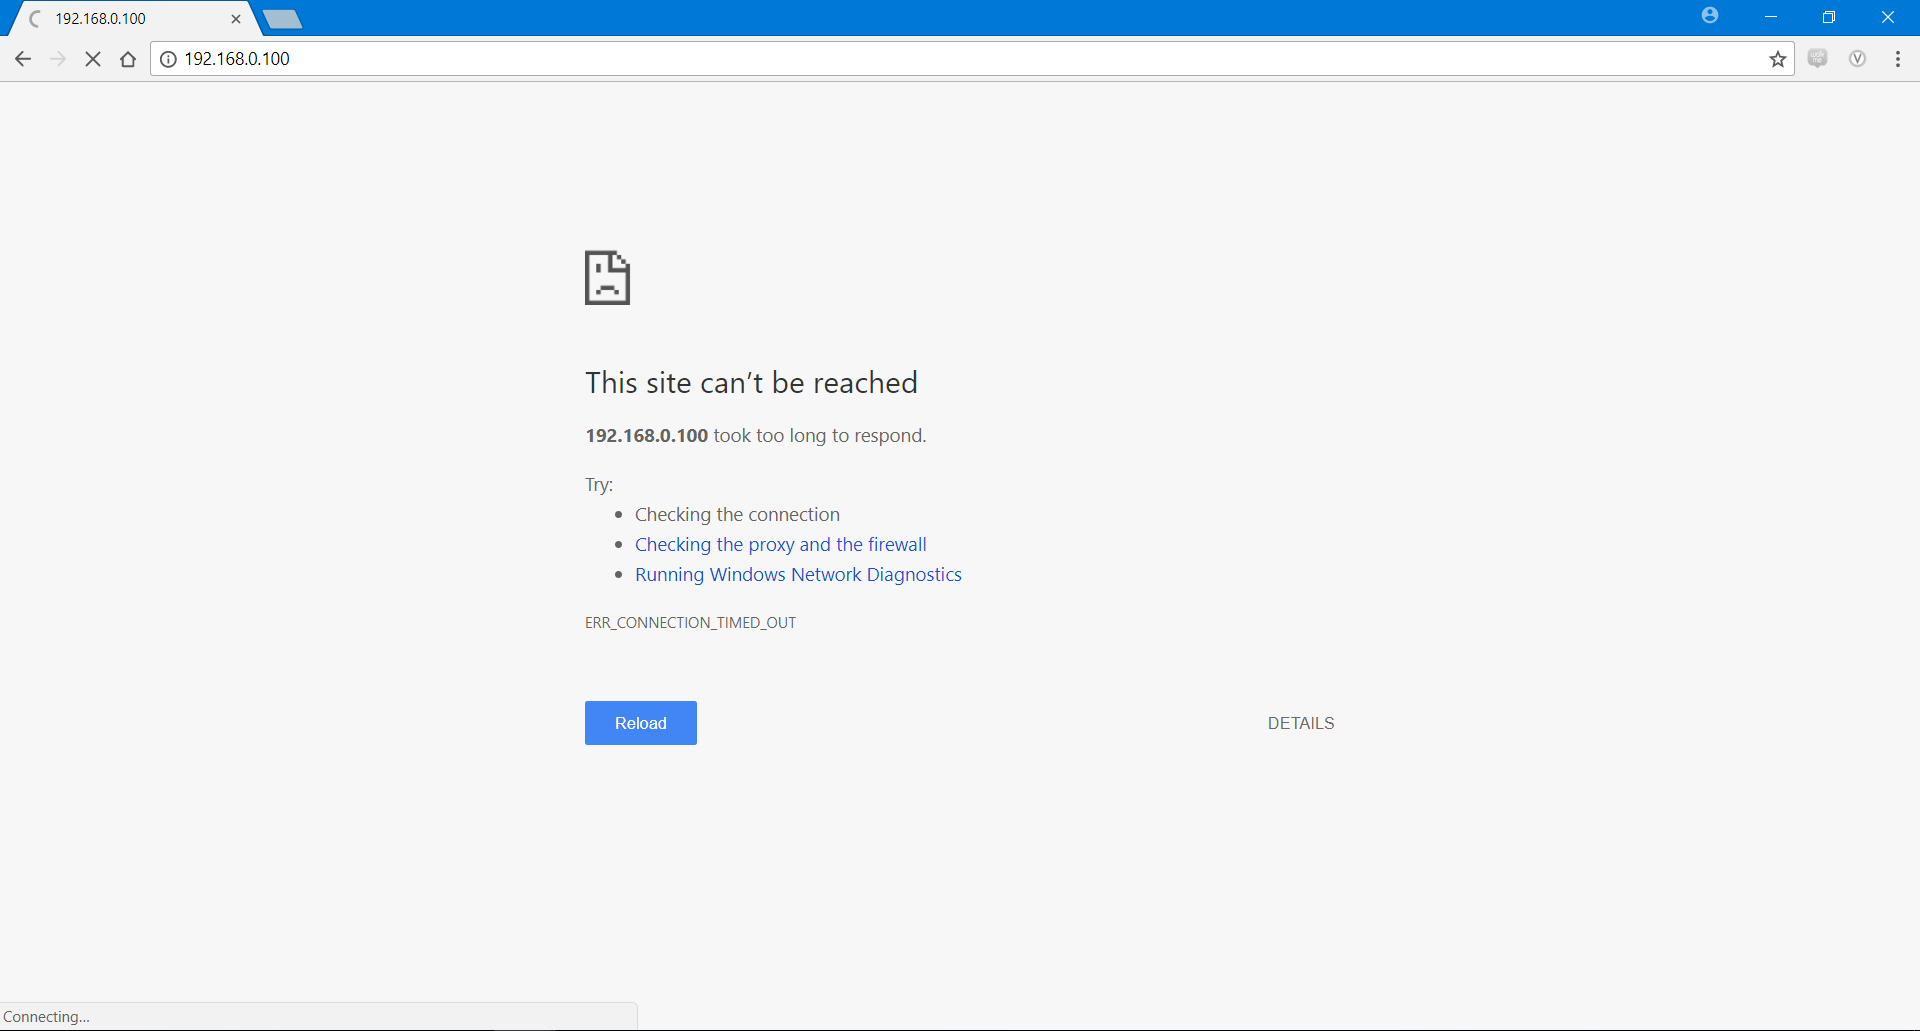
You open a browser and enter the IP address provided in the cameras install instructions and… nothing. You get the dreaded “This site can’t be reached” page.
The first thing you should check that the IP Cameras IP and Subnet configurations are set correctly for your LAN.
Step 1: Find the network subnet of your LAN
With your PC connected to the Router open a Command Promt window (In windows 10 press the start button and type cmd and press enter).
In the shell type ipconfig and hit enter. This command will output details of your PCs Network Adaptors:
  Ethernet adapter Ethernet:

     Connection-specific DNS Suffix  . :
     IPv4 Address. . . . . . . . . . . : x.x.x.x
     Subnet Mask . . . . . . . . . . . : x.x.x.x
     Default Gateway . . . . . . . . . : x.x.x.x

  Wireless LAN adapter Wi-Fi:

     Connection-specific DNS Suffix  . :
     IPv4 Address. . . . . . . . . . . : x.x.x.x
     Subnet Mask . . . . . . . . . . . : x.x.x.x
     Default Gateway . . . . . . . . . : x.x.x.x
If you are connected to the Router with an Ethernet Cable then look for the following Ethernet adapter Ethernet section or WiFi then look for the following Wireless LAN adapter Wi-Fi section.
For example; Here is a sample of what it might look like.
  Connection-specific DNS Suffix  . :
  IPv4 Address. . . . . . . . . . . : 192.168.1.2
  Subnet Mask . . . . . . . . . . . : 255.255.255.0
  Default Gateway . . . . . . . . . : 192.168.1.1
Note the Subnet Mask which is set to 255.255.255.0 in the above example. Also, note the IP address of the Default Gateway and the IPv4 Address.
Step 2: Find the IP and subnet set on the IP Camera
Most cameras come with a Search Tool Wizard that will find the camera on the Network (See your cameras install instructions for more details on this). When you find your camera with the tool look for the IP address, Subnet Mask and Default Gatway.
An Example: Here is an example of a IP Cameras configuration that will prevent a connection:
  IP: 192.168.0.100
  Subnet: 255.255.255.0
  Gateway: 192.168.0.255
Lets compare these with the details we got earlier.
  PC Config:                    Camera Config:
  IP: 192.168.1.2               IP: 192.168.0.100
  Subnet: 255.255.255.0         Subnet: 255.255.255.0
  Gateway: 192.168.1.1          Gateway: 192.168.0.255
There are two things wrong here. First the Gateway set on the camera is wrong. It should be 192.168.1.1 (This is the IP address of the Router).
Secondly, even though the Subnet Mask are the same the network subnet part of the IP address is different. The subnet mask is used to determine which number from the IP correspond to the subnet. This makes more sense when its converted to binary.
  -Dot-decimal notation-         -Binary form-
  192.168.1.2          ->       11000000.10101000.00000001.00000010
  255.255.255.0        ->       11111111.11111111.11111111.00000000
  Subnet               ->       11000000.10101000.00000001
In this case 255.255.255.0 will mask the first three number from the IP. So the subnet of the network is: 192.168.1. This means that any device connected to the network must be in the 192.168.1.0 to 192.168.1.255 range. The IP Camera is in the 192.168.0 subnet which is incorrect.
Step 3: Change the IP address of the IP Camera
With the Search Tool set the IP to 192.168.1.100 and the Gateway to 192.168.1.1. Save the changes and restart the Camera. Now that you have changed the IP address use this new IP address in the top search bar of your browser.
For example: http://192.168.1.100
All going well you should now be able to connect and view your camera with the browser.
For a more detailed description on Subnets see: https://en.wikipedia.org/wiki/Subnetwork